
Anyway, I decided to build one myself, so over the course of a few weeks, I did! And now I'm going to tell you all about it because I can :-)

I started out with some odds and ends of wood and chipboard we had leftover from a few years ago when I built a couple of table-top Lego play stations for my kids.

My brother owns a tabletop saw, all motorized and everything. But I didn't want to bug him just to cut some little boards up for me. Plus, we don't see them as much right now because of the whole sheltering-in-place thing. So I attacked my wood with a hand saw.

Toward the end, I really wished I'd taken it all to my brother's place. But I persevered. And didn't even get any blisters!

I cut enough wood to make TWO book nooks, but one of them is going to have to wait for later. One at a time!

So here are my pieces for my first book nook, the bigger one I planned to make. I have two large pieces of chipboard for sides and then various pieces of wooden edging for the top, bottom, and back (spine).

I just used the random acrylic paints we already have on hand because going to the store for fun stuff like this isn't exactly an option right now. I also ordered a few miniature things from Hobby Lobby's website, plus some moss ribbon.
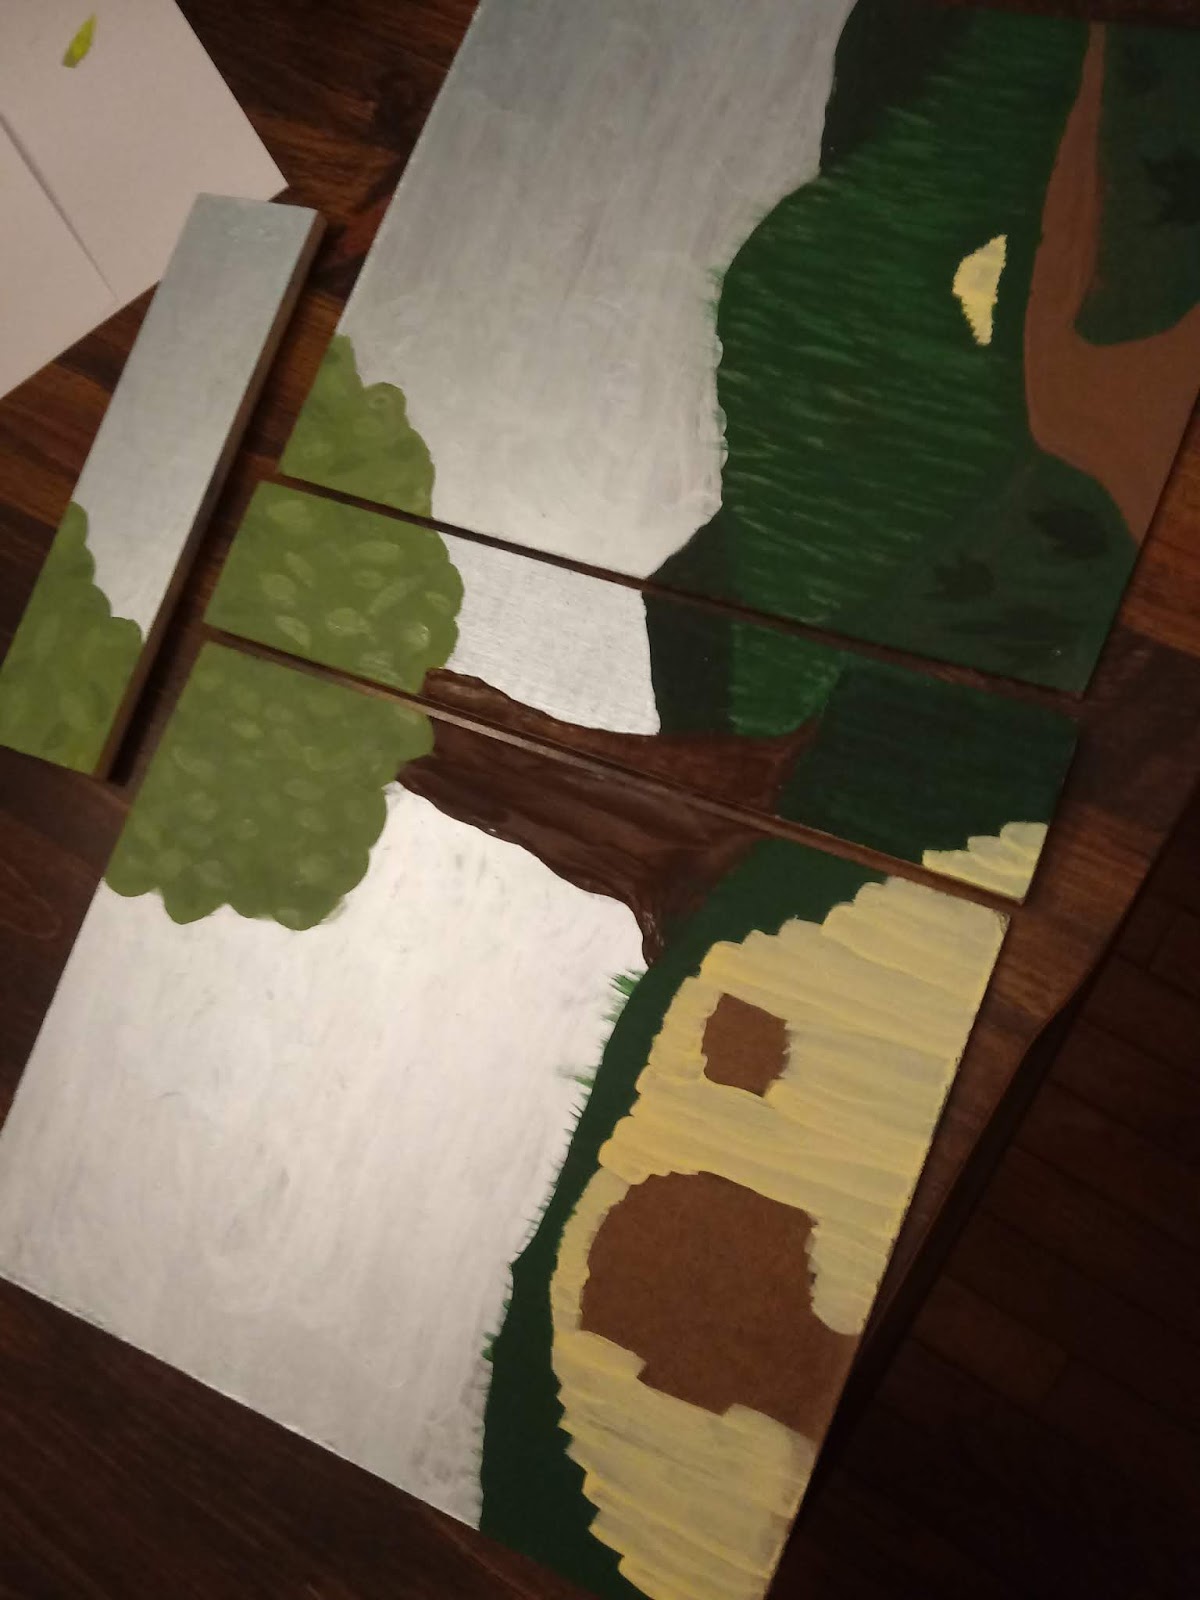
Here's the first layer of painting done! You'll see in the next pictures that I changed my mind about a few things, but this got the general idea down.

For some reason, I didn't save my photos of the second round of painting on my phone, so I had to grab these out of the Instagram story I've saved in my highlights of how this all went together. That's why these two pictures have words on them.

Here you can see the moss ribbon unrolled. I glued that and some sandpaper down to make the grassy lawn and little path leading out from my main hobbit hole. And I glued that round door onto the blank spot I'd left for it. I found that door on clearance a couple years ago, got it for maybe $2, just thinking I'd use it someday. And now I have!

Then I didn't do anything at all with this project for a couple of weeks because I got busy. But yesterday, I had time for it again, so I painted the backs of the boards to look like a book. They ended up looking kind of like wood, but oh well, they're still a nice brown.

I found an alphabet online that's based on Tolkien's writing he used for a hobbit script, and I painted this one for a title with gold paint. I'm absurdly pleased with how it turned out because I didn't write it on in pencil first or anything, or even practice the lettering, I just eyeballed the font on my phone and painted this freehand. Which was reckless, but fun. (And I could always have painted over it if it'd turned out terribly.)

Today, it was time to assemble all the pieces with my trusty hot glue gun. Which is actually a warm glue gun, and so much safer for my fingers.

Got both sides glued to the bottom.

Oh, I glued the fence in first so I wouldn't have to fiddle with that once the sides were on.

Then I glued in my props, which probably would have been better to do when there was only one side glued on, oops. I made it work anyway.

No one will ever see this view again because it's from the back. But isn't that little broom adorable? Love it.

I put the top on next. That made it a lot more stable, as it was rather wobbly.

Then I glued the back on. I'm afraid I hadn't cut my biggest boards very straightly, so they don't meet perfectly at the back. But I'm still very pleased with it.


I painted daffodils everywhere because they're my favorite flower. I don't recall them getting mentioned in any of Tolkien's writings about Middle-earth, but they're native to Wales, so I figure they could possibly be in the Shire too.

Here you can see how my back and top don't quite meet. Oh well. It's my first attempt.

I put a few birds in the sky, but they're hard to see now that it's assembled.

And now that it's done, I put it on my Tolkien shelves! My Gandalf is not quite the right scale to go with it, but that's okay.

I still like how this looks like he's going to step inside this book.

And here's a farther-away shot, showing off more of my Tolkien collection and how it sort of fits in quite naturally here.
I've got the wood cut for another, smaller book nook too. I'm thinking I'll do an LM Montgomery theme with that, something Anne of Green Gables-related, but I haven't decided what yet. We'll see!
It looks awesome! I remember you mentioning that you were going to make one and hoped that we'd see the finished product!
ReplyDeleteThank you, MC! Yes, finishing this let me check off another thing on my spring to-do list :-)
DeleteAwww, that's so cute! Great job! I have heard of book nooks but you're the first person that I know to attempt one. How awesome!
ReplyDeleteThank you, Regency Woman! It was really fun, and I am making plans for another :-)
DeleteThat's really cute!
ReplyDeleteThank you, Sarah :-)
DeleteI have never heard of these. It's a skinny book-shaped diorama! Interesting! what better place than your Tolkien shelf for this? I like Gandalf aiming to get in. :-D
ReplyDeleteDKoren, hee. Yes, that's exactly what it is! And happily, I had just enough room on my top Tolkien shelf for it :-)
DeleteI love this so much! Looks fantastic!
ReplyDeleteThank you, Skye! I'm hoping to make the other one in June :-)
DeleteWow. Impressive! I have no talent for things like this.
ReplyDeleteBy the way,I am nominating you for the Sunshine Blogger Award at http://www.storyenthusiast.com/celebrating-the-sunshine-blogger-award/
I always enjoy reading your blog.
Thank you, Story Enthusiast! It was fun to make :-) And thanks for the nomination! I will scoot over there and check it out.
DeleteI love these! I might have to make one, Narnia maybe? Or Rivendale?
ReplyDeleteThanks, Livia! They're so sweet and cheery. Narnia would be so fun!
Delete